Tuesday, September 18, 2012

HOME CANNING DAIRY AND NUT MILKS

Canned Milk
Canning milk at home save you money, especially when it comes to soy and nut milks.  Whether it be a dollar here or a dollar there, by the end of the month  you will definitely see the savings if you drink dairy or non dairy milks.  Another benefit of canning milk, is that you have the satisfaction of knowing what exactly is in that jar, and how long it has been shelved.  No preservatives here if I can it properly, right?

As you know I cook a lot using dairy and non dairy milk.  I stay busy in my kitchen so I like to not run out.  One way to do this is to keep my pantry stocked with my dairy and non dairy milks which l have canned. The dairy milk is similar to boxed milk that can be shelved, but not quite like evaporated milk.  However, the soy and nut milks taste just as fresh as when I first made it.  Soymilk  and nut milks do not last in my house more than a month, because my son loves it and takes a jar with him in his backpack for school.  It's makes it very convenient and it costs very little to make the milks yourself if done at home.  All you have to do is can it.  By the way, you can also can store bought nut milks too.  Yum almond milk.

1.  Here are 8 sterilized jars (under the
cloth) and my dairy milk
2.  These are the utensils I used
For some reason there is not much information of canning milk, but you know it's out there as it can readily be bought at the grocers.  Another YouTuber, named, "The Preppers Wife" has really helped me out canning milk.  She was able to get some info from the universities regarding safely canning milk.  Great video. I highly recommend it.  So like she said, she received canning safety info regarding pressure canning, which gave her a large range to choose from...like minutes and weights. The only canner I have is a  10 quart, Fagor pressure cooker/canner. It works fine since my family is small.   There are no weights just a knob with 3 positions, steam, 1 and 2...2 being high of course.

Again, there are no official guidelines for home canning milk so, please use your own  canning manual for safety measures as they all differ. However, I just realized that I opened my last jar of canned milk.  So, I thought I'd share with you how I do it since I am canning more dairy today.  Note, I haven't had a problem with it yet, and I've canned a lot of dairy and non dairy milks with success.  I am sharing with you how I do it.
First of all I am using 12 ounce jars.  They are the same size that the markets sells evaporated canned milk.  The difference here is they cost averaging $1.10 per 12 ounce can in most markets today.  I am using a little over a half gallon, to get eight 12 ounce jars.  I paid $2.79 per gallon of milk so I paid approximately $1.60 for the whole eight 12 ounce jars.  Not bad huh?

Ingredients:
  • Milk  Dairy or non dairy   Enough to fill you 12-16 ounce jars
  • Jars and Lids  12 - 16 ounce  MUST BE STERILE. 
  • Canning utensils
  • Vinegar 2 tablespoons
  • Moist cloth to wipe rims of jars
  • Kitchen towel to put hot jars on


  • 4.  Yes it can get messy  (I  was born with
    essential tremors and this was a good day
    for me.  lol)

3.  I filled each jar using a funnel leaving
 a one inch headspace from the top.


5.  Make sure you clean the rims with a
damp cloth

6.  Add the hot lids and twist hand tight.


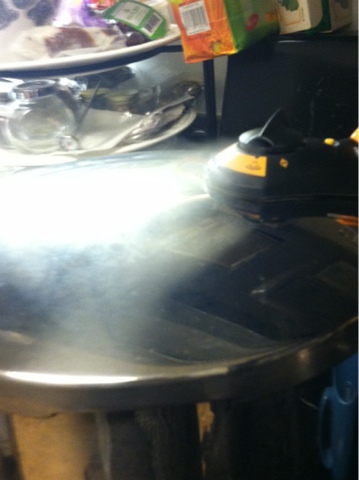
8.  I have the steam venting on a high
stove flame for 10 minutes.  I them put the
pressure on # 2.  Which was high
 for another 10 minutes with the stove flame
 on  medium # 5 on my stove.
I then turned the stove off
7.  Add the vinegar to three inces of water.
Then add the jars.  They fit nicely in the
 pressure canner.
 9. Once the safety lock released automatically I opened and set the jars to
 cool on a towel.  I then waited to hear that ping
sound.  That took about another 15 minutes.  But now I'm
done, and I have 8 jars of milk that looks very close to
shelf carton milk that is still good for cereal, and anything
you would do with milk except make cheese, or yogurt.

So there you have it.  Well actually I have it, for I now have 8 jars of canned dairy milk that I can use for a rainy day.  Good to know I have it for food storage too.  And it cost very little to make it at home.  I use this same instructions for soy and all my nut milk canning. I hope you too can benefit from this simple canning knowledge.  Yes you can, can dairy and non dairy milk.  Please feel free to share this site with others so they too can benefit on the savings.
Please feel free to ask any questions and or comment.  Well that's it for now, so till the next time...Goodnight and God Bless you all.
Sincerely,

Mary Helen

Sunday, September 16, 2012

SWEET LEMON OKARA

SWEET LEMON OKARA  can be served hot or cold.
Here is a simple recipe using leftover okara..  Okara is the mashed soybeans strained after soybean milk is made.  Today I made soymilk, and tofu, and I had about a pound of okara left over.  You can cook with it but since I had prepared my soymilk in the VitaMix blender, it came out with a very nice silky texture. I didn't want to discard it since one of my motto's is "waste not want not", and my other motto is "food is medicine".  So in my quest to find something tasty yet healthy I came up with this SWEET LEMON OKARA.  So easy to make, let's do it.

Ingredients:
Mix all the ingredients well and microwave.
  • Okara 1 cup cooked and strained well
  • Lemon juice 2-3 tablespoons and or 1/2 teaspoon of grated lemon rind.
  • Sugar  2 tablespoons or (to taste, may use sweetener of your choice)
  • Tumeric 1 teaspoon
  •  Coconut oil, or butter 1 tablespoon
  • Salt 1/2 teaspoon
Instructions:
Mix all the ingredients together in a microwave safe bowl, and put in the microwave for 5 minutes on high. Voila, it's done.  This is very good hot, but can be served cold as well.  It's very silky and pretty as well.  I topped my scoop of okara with agave syrup.  Healthy and delicious.Yum.
Haha. I told you it was easy.  I used an ice cream scooper to serve.

Well, that's it for now, I just had to share the outcome of my Sweet Lemon Okara with you because it's delicious.  Again, thank you for allowing me to be of service.  Many blessings to all.
Sincerely,
Mary Helen


Thursday, September 6, 2012

MOZZARELLA CHEESE MADE WITH POWDERED MILK USING YOUR MICROWAVE OVEN

Mozzarella cheese made with gt Kombucha, nonfat powder milk,
your favorite oil, and a microwave.  All done in less than
30 minutes
Why make mozzarella cheese from nonfat powdered milk?  For one you have total control of the kind of oil being put in your body.  Remember food is medicine.  The wrong fats can hurt our body by clogging our arteries, etc.  The good fats are healthy because they have a lot of nutrition that our body loves and readily absorbs.  Good oils also makes a great intestinal cleaner by helping move and dissolve any encrusted matter in our colon.   We need to keep our colon clean and healthy and oil is a good way to do this.  My cardiologist told me to have a tablespoon of  a healthy oil before each meal if I wanted to lose weight.  It was years before I took his advice.  He was right, I am slowly losing weight adding healthier oils to my diet.  Homemade mozzarella cheese is a great way to oblige.  Of course all in moderation right?

Mozzarella cheese is so easy to make and all it takes is a few ingredients that most kitchens might have on hand. NO RENNET TABLETS OR THERMOMETER NEEDED HERE! I prefer this nonfat powdered milk recipe because I get to control what goes in my body and I want to continue to remain diabetic free. With this recipe, I get to add the oil I choose to use.  If I am going for Italian flavor, I would use extra virgin olive oil.  If I am looking for a sandwich cheese flavor, I would add butter as my oil.  If I want cheese and crackers I think I would go with grapeseed oil.  You can use any oil. Peanut oil of course will give it a nutty flavor.They will all work fine.  Ready? Its so easy. Here it goes...

Ingredients:
  • Warm water 3 cups
  • Nonfat powder milk 2 1/3 cups
  • Oil 1/2 cup of your favorite oil.
  • Apple cider vinegar or lemon juice, 1 cup (I used my gt kombucha with a ph of 2.5 and worked fine)  Note any kind will work.
  • Sea Salt 1 teaspoon
  • Pot, stainless steel or glass greased well on the bottom and sides.
  • Bowl, microwave safe
  • Ice, two cups in two cups water for the cold set.
  • microwave oven
Instructions:

Mix warm water, oil with nonfat powder milk in blender.
Heat greased pot till it begins to smoke.
Add milk and stir  the bottom to avoid burning on the bottom.
Add vinegar and stir to mix and let sit for 10 minutes.


Next I added the vinegar.  REMOVE
FROM THE STOVE and
let it sit covered  for 10 minutes.

The curds are floating
on top and have
separated most of
curds and whey.


Strain whey from the curds
Oops don't do this.  I was
multi-tasking lol.


Transfer curds to a
microwavable bowl.  Rinse
with warm water, being careful
not to lose the curds and they
will appear to liquify.  
Heat for 1 minute in the
microwave.  Drain whey,
and keep folding curds with a
utinsil because it is hot.  Add Salt
and or spices now.
Continue microwaving in increments of 30 seconds
 keeping it warm thus soft and workable,
draining whey each time.  and
folding over until it somewhat
has a pull and a shine to it.
About 3 times.


Once it is done and shiny like this one,
put in a bowl of ice water to set.  It's done.
Dry and store unused cheese in the
 refrigerator, and enjoy
It's still warm in the center but looks good
enough to eat.

As you can see it melts very well.  I topped my pita bread
with my melted mozzarella and my homemade
Chunky Tomato & Jalapeno Preserves.  Yum.

Well that's about it for now.  I truly hope you try this easy recipe.  Be creative in the kitchen, and at the same time $ave $$$.  Have fun, and be well.  Remember food is medicine.  Many blessing and thank you for letting me be of service.

Sincerely,
Mary Helen